Cookie
Electronic Team uses cookies to personalize your experience on our website. By continuing to use this site, you agree to our cookie policy. Click here to learn more.

How to share local USB Devices on macOS

Electronic Team Electronic Team Feb 16, 2021
When you need to share USB on a host macOS computer, perform the following steps:
1
Start USB Network Gate.
2
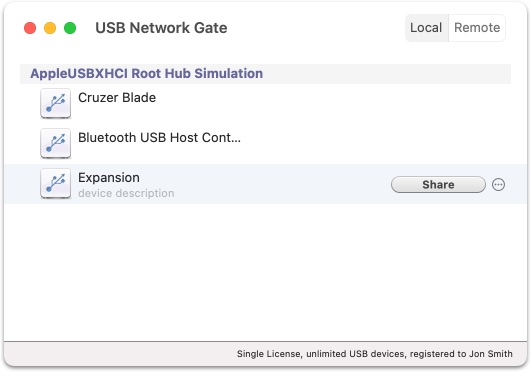
In the upper part of the application window, click Local pane.
 Local pane
3
The main area of Local pane contains a list of USB devices that are currently connected to the host computer. Find the USB device that you want to share and select it. If you do not see the desired device, unplug the device and try again.
4
Click Share button.
5
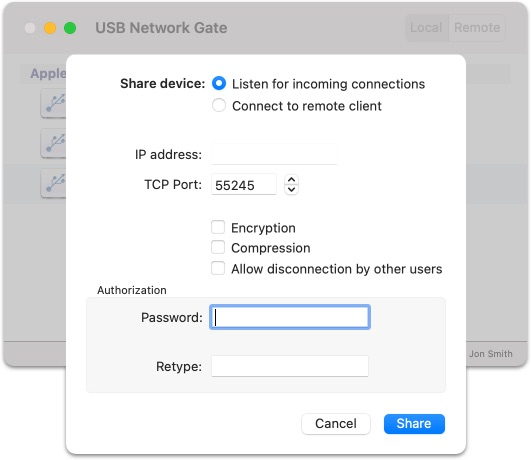
In the dialog that appears, configure some sharing options for the selected USB device.
 Sharing options
6
Indicate the TCP Port in the corresponding field. This port should be unoccupied in your system.
7
If you are not sure about the proper value for this field, leave it empty and USB Network Gate will automatically set a random TCP port.
8
Tick “Compression” box if you want to compress traffic. This option helps speed up interaction with certain types of USB devices and reduce Internet traffic. You may find this useful for USB devices which transfer data in uncompressed format, like scanners.It is recommended not to use this option for USB devices which transfer incompressible types of data, e.g. isochronous USB devices (audio cards, web cams, etc.).
9
To configure security for the connection, see our article How to Secure Connections.

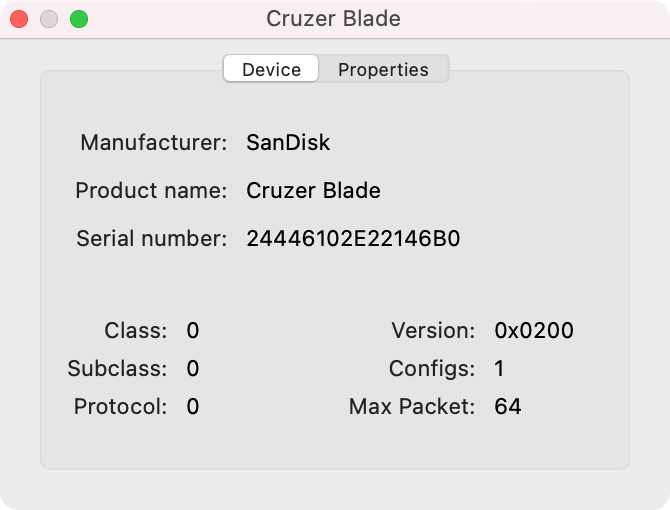
Note: To view additional info about your USB device (Vendor, Manufacturer, Serial Number, etc.), go to menu –> Device –> Inspector:
 info about device
10
After you specify all the necessary options, click Share.
11
Your USB device is now shared and available for client computers.
logo USB Network Gate
#1 at Network Communication Software
USB Network Gate
Share USB over Ethernet
4.7 rank based on based on 372 + users