Whenever you need to obtain remote access to a USB from the client side, make sure that on the server side said device is connected to the shared USB port. Although it is best to plug your USB device to the port before sharing, it isn’t mandatory. You can just share any port that is free at the moment, and then plug your device into it.
For the sake of simplicity, let’s assume that you’ve already connected the USB device to the port we’re about to share. Here’s what you’ll need to do next:
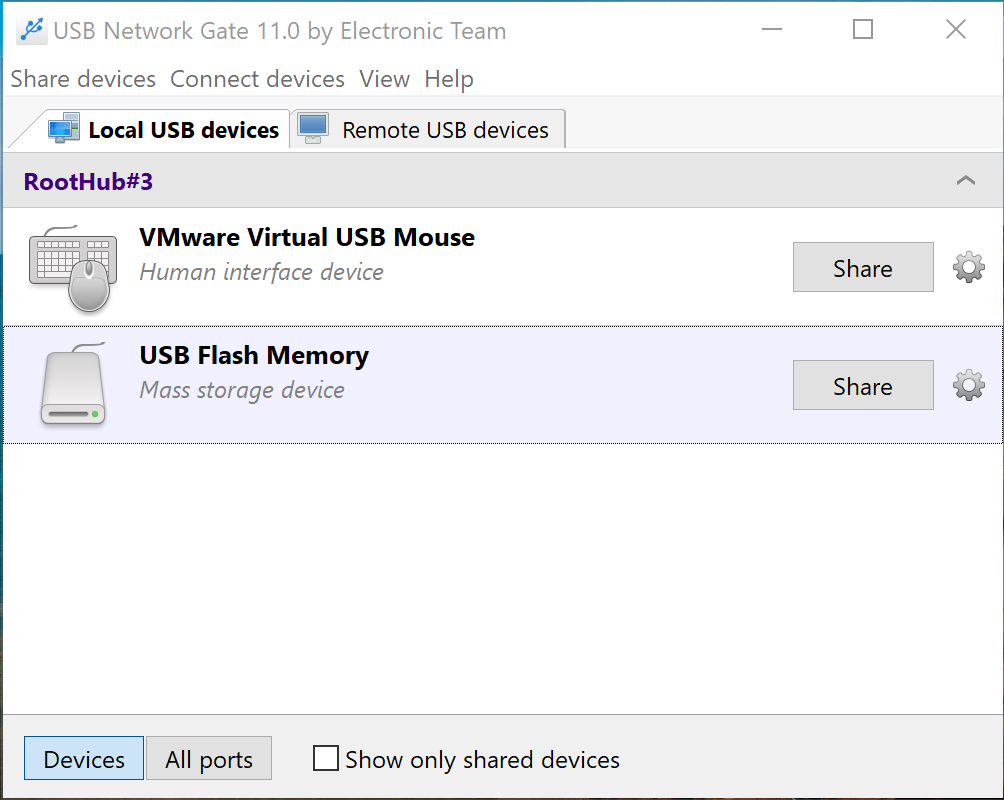
Step 1: Run USB Network Gate and go to the Local USB devices tab.
Step 2: Click Share next to the device that you want to share.
Step 3: Use the invoked Sharing options tab to customize the settings to your liking.
Here are some options you can go with:
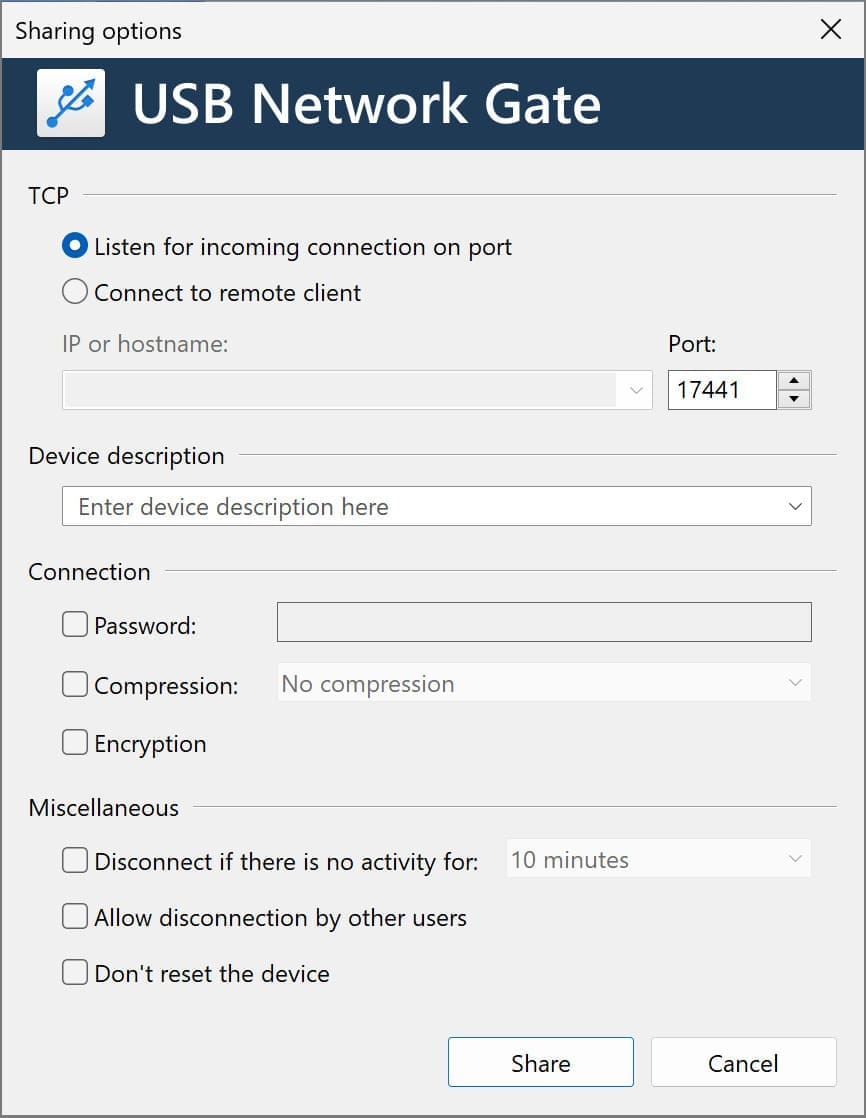
In the TCP section, you can assign a specific local TCP port for the connection by choosing Listen for incoming connection on port. Alternatively, you can enable the Connect to remote client option for the reverse connection initiated from the server side.
The Connection section comes in handy if the device you’re about to share contains any sensitive data that needs protection. Tick the Encryption box to enable traffic encryption. This may somewhat reduce the data throughput performance but, on the flip side of the coin, for sure increases the security fetch protection. Enabled Traffic compression option can fix this issue to a certain extent, most notably while sharing a scanner or some other device that doesn't compress their transferred data. However, some peripherals, e.g. webcams and audio cards, only work with data that can’t be compressed at all. With this in mind, make sure the device you’re about to share is not an isochronous USB device before enabling compression.
The Authorization section allows you to secure your connection with a password. By this means, anyone attempting to access the shared device will be prompted to enter this password.
By ticking the Allow disconnection by other users box you authorize any remote user to unlink other users from the shared device.
The Device description field can assist you with further device identification. You can give your shared device a custom name visible on both server and client machines. From there on, even if you’ve got two devices of the same type there’ll be no problem telling them apart.
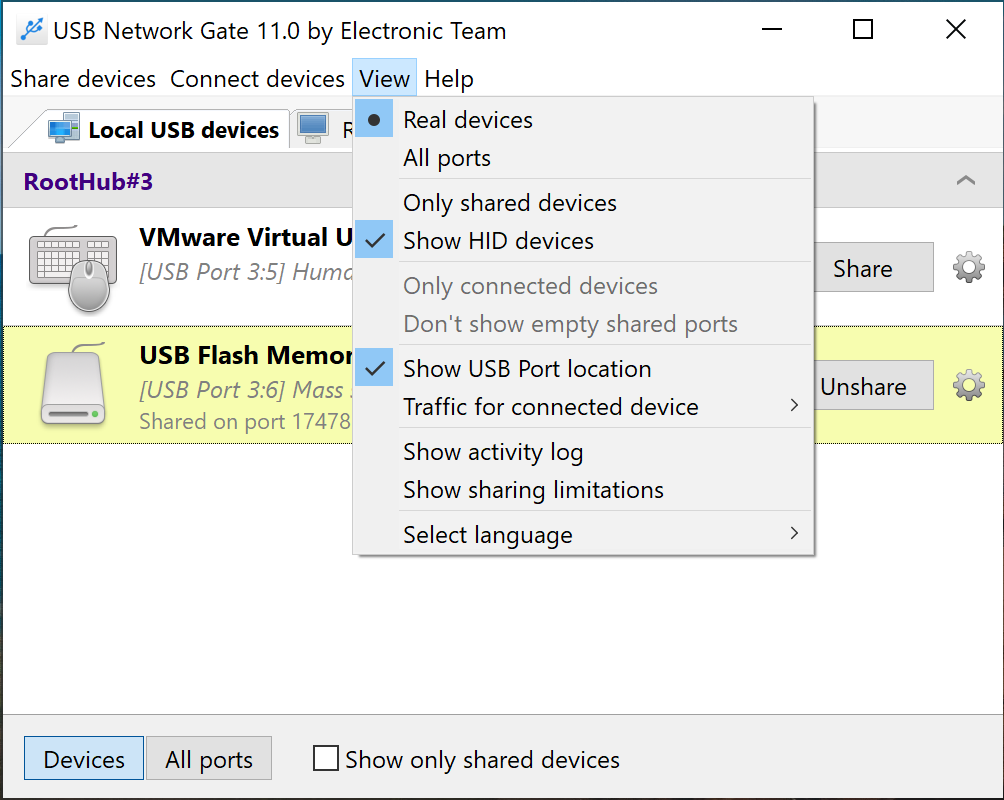
To make device identification even easier, you can get the USB port location to be displayed in device description. Just click View in the main menu and pick the Show USB port location option from the drop-down list:
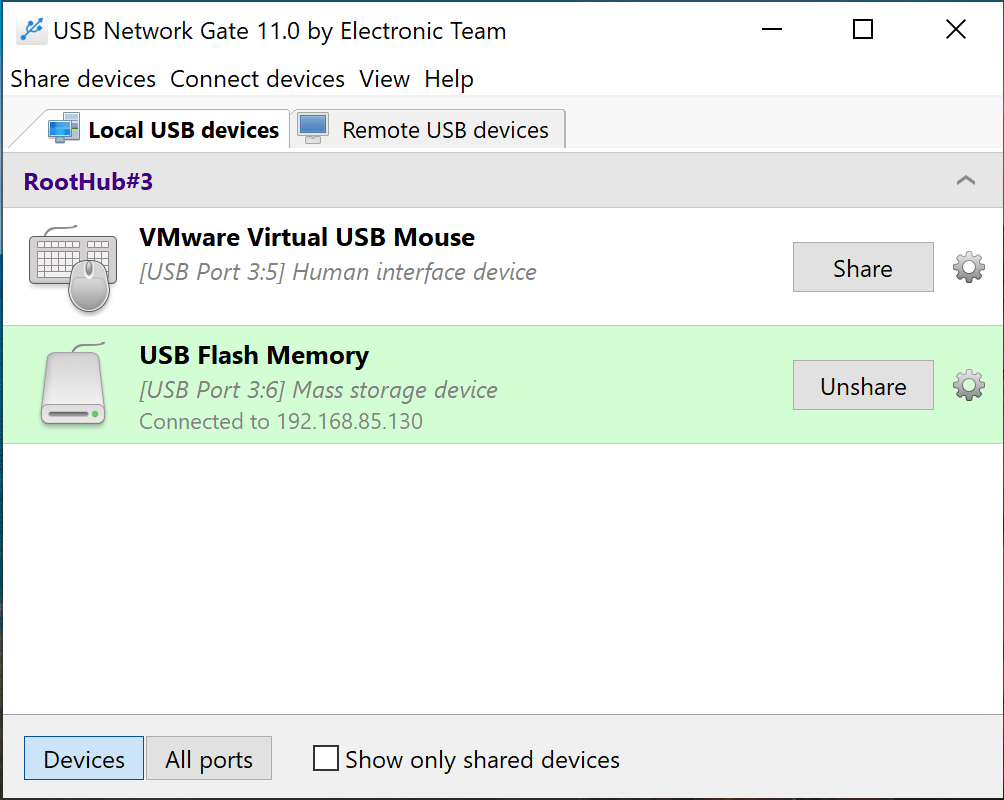
As soon as you click the Share button on the Sharing options tab you’ll be able to use your shared USB device remotely from the client PC. In case the steps above didn't work out for whatever reason, disconnect your USB device from the port and share the port individually. After then, attach the USB device to this shared port.